
My cousin-in-law commissioned me to paint a still life for her, of a teacup with steaming tea, a crochet needle, and Walt Whitman’s “Leaves of Grass”. The quality of the result surpassed my expectations, and I think that was mostly due to a process I tried. Good artists use this method or one like it all the time, but I’m sometimes a stubborn and cavalier sort of fellow, so I had always thought I could do without it.
Composition and Lighting (~3h)
I started by arranging the items in every way I could think of, paying attention to leading lines, balance, and negative space. Once I found the composition that suited the objects best, I lit the scene using a lamp and a mirror to create dramatic shadows that drew attention to the focal points. I took a picture of the final arrangement and used that as my reference for the rest of the project so my perspective and lighting would be consistent.
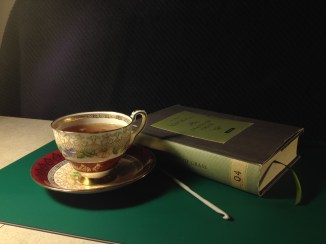
Line Drawing (~2h)
Using a grid overlaid on the reference photo, I carefully drew in the general outline and some details of the objects onto 140 lb watercolour paper with a 4H pencil.
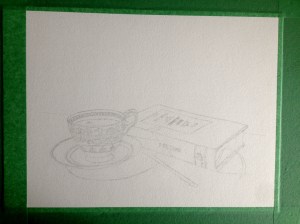
Background Wash and Steam (~1h)
Knowing the background would need to be dark for the steam to be visible against it, I used a mixture of intense blue and burnt umber, applied with much water in circular strokes with a no. 6 filbert brush. For the table, I used the same intense blue and burnt umber, but with more emphasis on the umber. I think I might have tossed in some burnt sienna as well. To keep the object edges sharp without impinging my free brushstrokes, I masked them off with green painter’s tape. If you use this technique, I strongly recommend de-stickifying the tape first by applying it several times to some cloth surface where it can pick up lint. Otherwise, you’ll end up losing a lot of your paper along with your mask.


The steam was going to make or break this picture (and I wasn’t sure I had the chops to do it well), so that’s what I wanted to get out of the way right from the get-go. If it wasn’t going to work out, I wanted to know that before investing a lot of time in the detailed drawings. I used white charcoal, which seemed to work quite nicely. It’s a little tough to see in these photographs (no steam on left, steam on right), but it looks great in the original. The trick to believable steam is subtlety.
Coloured Pencil Drawing (~7h)
Diligence was my watchword while transcribing the reference photo onto the page. I used a combination of coloured pencils, graphite, and charcoal: coloured pencils for colour (of course), graphite for subtle shading and grays, and charcoal for dark shadows and blacks. Every small detail and subtle change in lighting or shadow I mimicked as best I could, patiently working and re-working areas until I was satisfied. The cup alone took about 4 hours to do.
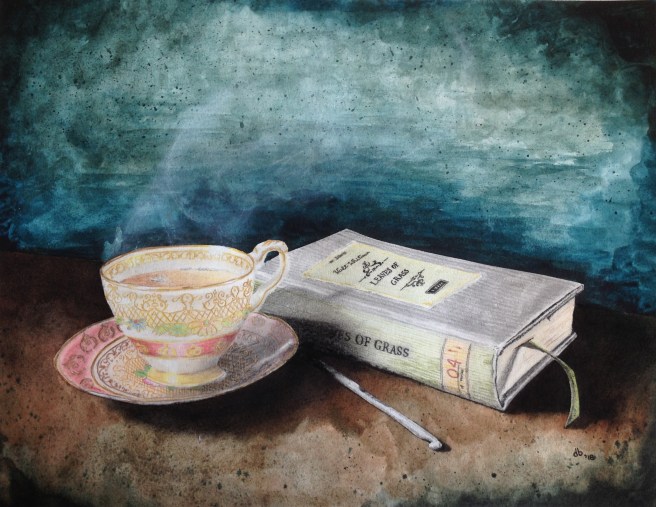
Some lessons learned:
- As good as you think you are, you can always learn something from the pros.
- Working from a carefully taken reference photo is the key to consistent and believable lighting and shadows. Having that photo zoomable on a tablet is fantastic for details.
- Charcoal and graphite don’t adhere well to the waxy surface of several layers of coloured pencil (note the saucer on the right-hand side; I wanted that shadow darker, but it just wouldn’t take). Do shadows first, colours after.
- Attack the most difficult parts of the picture first before investing your time in other areas. If something goes irrecoverably wrong, you’ll waste less time.
- Patience, patience, patience.

 od, that when glued and screwed together create the cutouts necessary for all the pieces to fit in properly. Both the harmonica and USB stick are held in place using friction fits, which actually turned out remarkably well given my limited experience with woodworking projects. If you’re planning on making your own watch or something similar, I recommend cutting your pieces very slightly larger than required and sanding down, testing the fits as you go until you’re satisfied.


